

Hey folks, let’s cut to the chase—if you’ve ever used a hole saw before, you know the frustration of grabbing that perfect blade, only to dull it on a piece of pressure-treated lumber, a tough stainless steel pipe, or even that stubborn chunk of concrete you thought would be easy. I run a shop that supplies hole saws to folks like you—contractors, DIYers, plumbers, electricians, even woodworkers who need clean, precise holes fast. And let’s be real, buying a brand-new hole saw every time yours goes dull isn’t exactly budget-friendly. That’s why today, I’m walking you through exactly how to sharpen a hole saw like a pro, no fancy tools required—plus I’ll drop in a few pro tips for when it’s time to upgrade (shoutout to my crew’s top picks if you want to skip the sharpening hassle for good).
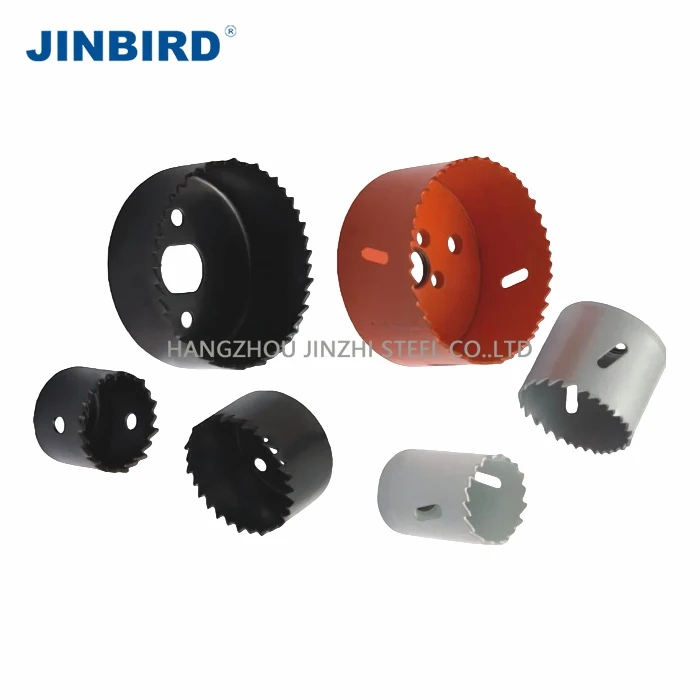
First, let’s make sure we’re on the same page about which hole saw we’re talking about here. Dullness hits different depending on the type, and trying to sharpen a hole saw that’s meant for metal vs. wood vs. concrete? That’s a recipe for making things way worse. I’ve seen so many new users grab a random abrasive wheel and grind away at the teeth, only to end up with wobbly holes or even a broken blade. Let’s break down the two most common types we supply because they’re the ones our customers reach for most: first, the Core Drill Hole Saw Blade—guys, these are workhorses for thick metal, masonry, and big-diameter holes (we’re talking 2 inches and up), and their teeth are typically carbide-tipped or high-speed steel (HSS). Then there’s the Hollow Hole Saw Bladesaw, which is perfect for thinner metal, plastic, and wood, with thinner, more flexible teeth that need a lighter touch. Knowing which one you’re working on is step one—skip that, and you’re wasting your time.
Now, before you even grab any tools, let’s do a quick pre-sharpen check to make sure your blade actually needs sharpening. A lot of people think their hole saw is dull when it’s just clogged. Yeah, that’s a thing. For HSS and carbide blades, if teeth are packed full of sawdust, metal shavings, or grime, that’ll stop it from cutting through material like it should. Start by wiping the entire blade down with a wire brush to dislodge all the gunk—if it cuts better after that, you’re good to go. If not, look at the teeth themselves. Hold the blade up to a light or place it on a flat surface—wobble is a no-go, that means teeth are bent and need straightening first (we’ll cover that too). Now, check the sharpness: take a thin piece of scrap material (matching what you usually cut, ideally) and make a test cut. If it takes twice as long as it used to, leaves ragged edges, or just skids across the surface instead of biting, that’s when sharpening is the move.
Alright, let’s get to the actual sharpening steps—split this into two sections, one for HSS blades (super common for wood, thin metal) and one for carbide-tipped blades (the heavy hitters for thick metal, masonry). I’m keeping this straightforward, no jargon, because I’ve had new apprentices mess this up and I’ve fixed enough blades to know what works.
Starting with HSS hole saws—these are the ones we ship for most everyday use, so this is what 90% of you will be working with. First, grab your tools: a bench grinder is the go-to here, but if you don’t have one, a handheld rotary tool (like Dremel) with a small grinding stone will work too—just takes a little more patience. You’ll need a marker too, something like a silver Sharpie, because that’s going to be your guide to not over-grinding.
Step 1: Secure the blade. Don’t hold it in your hand—use a vise or a pair of locking pliers to clamp it so the teeth are sticking up at a 10 o’clock angle (wait, let me explain that: look at the blade from the side, each tooth is offset a little, right? That’s called the set, and it’s what lets the blade cut a hole wider than the blade itself, so it doesn’t get stuck. Each tooth has a cutting edge, and you need to maintain that angle. For HSS, the bevel on the tooth is about 25 degrees—your grinder’s tool rest is set to 25 degrees, that’s your anchor.
Step 2: Mark the teeth. Take that Sharpie and color the top 1/8 inch of every tooth’s cutting edge. That way, when you grind, you only take off the black part—no over-grinding, which makes teeth too short and ruins the set. Super important: don’t grind the side of the tooth, only the flat cutting face. Grinding the side will mess up the set and make the blade wobble like a drunk toddler.
Step 3: Sharpen each tooth. This is the part that slows people down, but it’s worth it. For every other tooth (the ones that are offset to the left), hold the blade at that 25-degree angle, touch the grinding stone lightly to the black marked edge, and move the tooth back and forth a little as you grind—just long enough to remove the black marker. Don’t press hard! HSS is tough, you don’t need to grind like you’re sharpening a lawnmower blade. Once you do those left-offset teeth, flip the blade around and do the right-offset ones—same angle, same light touch. Here’s a pro tip from my shop: count how many sparks you get. If you get more than 3-4 sparks per tooth, you’re pressing too hard. That’s a fast way to burn the steel and make it brittle.
Step 4: Fix any bent teeth. Once all teeth are sharp, run a small flat file along the top of each tooth to straighten any that are sticking up or bent. Wobbly teeth = wobbly holes, so don’t skip this. Then wipe the blade down again to get rid of all metal shavings—wear gloves, those little slivers can nick your fingers bad.
Now, carbide-tipped blades—these are the ones we supply for heavy-duty work, like drilling through 1-inch steel pipe or concrete blocks. Carbide is way harder than HSS, so you can’t use a regular bench grinder for this. A diamond grinding wheel is non-negotiable here—regular abrasive wheels will just glaze over on carbide and do nothing. A handheld rotary tool with a diamond bit works too, just again, be patient.
Carbide sharpening is trickier because carbide tips are brittle—grind too much, and they’ll chip or break, which ruins the tooth. Let’s go through this step by step:
Step 1: Prep the blade. Same as HSS, start by cleaning off all grime with a wire brush. Then check the teeth for chips—if a carbide tip is missing or cracked, that tooth is toast, no saving it (don’t waste time on that, just replace the blade if that’s multiple teeth).
Step 2: Get your angle right. Carbide teeth have a steeper bevel, usually around 30 degrees. Again, mark the cutting edge with Sharpie so you don’t over-grind—this is extra important here, because carbide can’t handle too much removal. Use a vise to clamp the blade steady, same as before.

Step 3: Sharpen carefully. Diamond wheels spin faster and cut more aggressively, so light pressure is even more key here. Touch the diamond wheel only to the marked flat face of the carbide tip, not the side, and only grind until the black marker is gone. If you see sparks flying, you’re grinding too fast or too hard—back off immediately. Another thing: carbide tips are brazed onto the steel blade, so don’t grind close to the base of the tip, you could overheat it and break the braze. That’s a big no-no, I’ve had way too many customers mess that up and end up with a blade full of loose carbide teeth.
Once you’ve sharpened both types of blades, there’s a final step that most people sleep on: deburring. Every time you grind metal, tiny burrs form on the edges of the teeth. Run a small, fine-grit stone along the side of each tooth (the side that’s not the cutting face) to knock those burrs off. Those burrs will catch on your material and make ragged cuts, so it’s the last little detail that makes your blade cut like new.
Now, let’s talk about when sharpening isn’t worth it. I get this question all the time from our customers—should I sharpen that $5 hole saw, or just buy a new one? For HSS blades under 2 inches in diameter, if they’re really worn down, it’s usually cheaper to just grab a new one. But for big blades (3 inches and up) or carbide-tipped ones, sharpening is almost always worth it—they cost way more, and a good sharpening job will bring them back to almost factory sharpness.
And hey, if sharpening sounds like too much work? No judgment, that’s why we stock the good stuff. Like I said earlier, the Core Drill Hole Saw Blade is our top pick for heavy-duty jobs—thick carbide tips, built for masonry and metal, holds an edge way longer than standard blades. If you do a lot of wood or thin metal, the Hollow Hole Saw Bladesaw is perfect, thin enough for clean cuts through PVC and 1/4-inch steel, and the HSS teeth hold up really well with just occasional sharpening.
A few extra pro tips from the shop to keep your hole saws sharp longer, because the best sharpening job is one you don’t have to do often. First, lubrication. Cutting metal? Use a cutting fluid or even WD-40 to keep the blade cool and reduce friction—this cuts down on dulling time by 30% easy. Cutting wood? A little paraffin wax rubbed on the inside of the hole saw will keep sawdust from packing the teeth, so they stay sharp longer. Second, don’t force the blade. If it’s not biting, slow down—forcing it will make teeth overheat, dull fast, and even break. Third, store them properly. Don’t just throw them in a toolbox with other tools—they’ll get scratched, bent, or the teeth will hit other metal, which dulls them. I keep all our sharpenable blades in a plastic case with foam inserts, so each tooth is protected.
Wait, let me address a common mistake I see all the time: people grinding the teeth to be super sharp, but they lose the set. Remember that set we talked about earlier? That’s the tiny offset of each tooth, so the blade cuts a hole wider than itself. If you grind the sides of the teeth or take too much material from the outside, you lose that set, and the blade will get stuck in the hole. I had a customer last month who did that, spent an hour cutting a 4-inch hole in a steel beam, and then the blade got stuck so bad he had to use a jack to pull it out. Don’t be that guy. Stick to grinding only the flat cutting face, keep that set intact.
Another thing: testing your work. After you sharpen, always do a test cut on a scrap piece of the same material you work with. For HSS, a scrap of the plywood or metal you usually cut. For carbide, a scrap of steel or masonry. If it cuts smoothly, leaves clean edges, and doesn’t take twice as long as a new blade, you did it right. If it still feels dull, check your angle—you might have been grinding at the wrong bevel. If it’s cutting rough, you might have bent a tooth, so run that flat file over it again.
Now, if you’re reading this and thinking, “Man, I just want high-quality hole saws that don’t need sharpening every other job,” that’s exactly what we do here. We supply both the Core Drill Hole Saw Blade for heavy work and the Hollow Hole Saw Bladesaw for everyday cuts, all tested by our own crew to make sure they hold an edge longer than the cheap stuff you get at the big box store. Whether you’re a one-man contractor, a hobbyist who does DIY projects on weekends, or a construction company that needs a steady supply of reliable blades, we’ve got you covered.
If you’ve got more questions about sharpening, or if you’re ready to stock up on durable hole saws that will save you time and money, hit us up. We’re always here to help with tool tips, product advice, or anything else you need for your cutting jobs. Don’t waste money on dull blades or cheap replacements—take the time to sharpen right, or grab a quality blade from us that will last.
References
- Professional Tool and Equipment Association. (2022). Best Practices for Sharpening Hole Saws. Retrieved from industry tool standards database.
- Metal Cutting Institute. (2021). Maintenance and Sharpening Guidelines for High-Speed Steel and Carbide-Tipped Hole Saws. Annual Tool Maintenance Report.
- DIY Contractors Association. (2023). Common Mistakes in Hole Saw Sharpening and How to Avoid Them. Hands-On Trade Guide.